Getting Started
Welcome to the webKnossos documentation. webKnossos is a tool for exploring large-scale 3D image datasets, creating skeleton annotations and 3D volume segmentations. Since it is a web-based tool, collaboration, crowdsourcing and publication is very easy.
Feel free to drop us a line or create a Pull Request if you have any suggestions for improving the documentation.
Create a webknossos.org Account
Signing up to webknossos.org is the easiest way to get started with webKnossos. Go to webknossos.org and create a new account. Please make sure to enter a correct email address. After you have entered your details, the account will be automatically activated and logged in.
Accounts on webknossos.org are free to use with published datasets. If you wish to use private datasets, there is an upload limit of 10GB. For more data storage, checkout the pricing page for paid plans that covers storage costs and provide support services such as dataset conversions. You can also rent a fully-managed dedicated webKnossos server from scalable minds or install webKnossos on your own server.
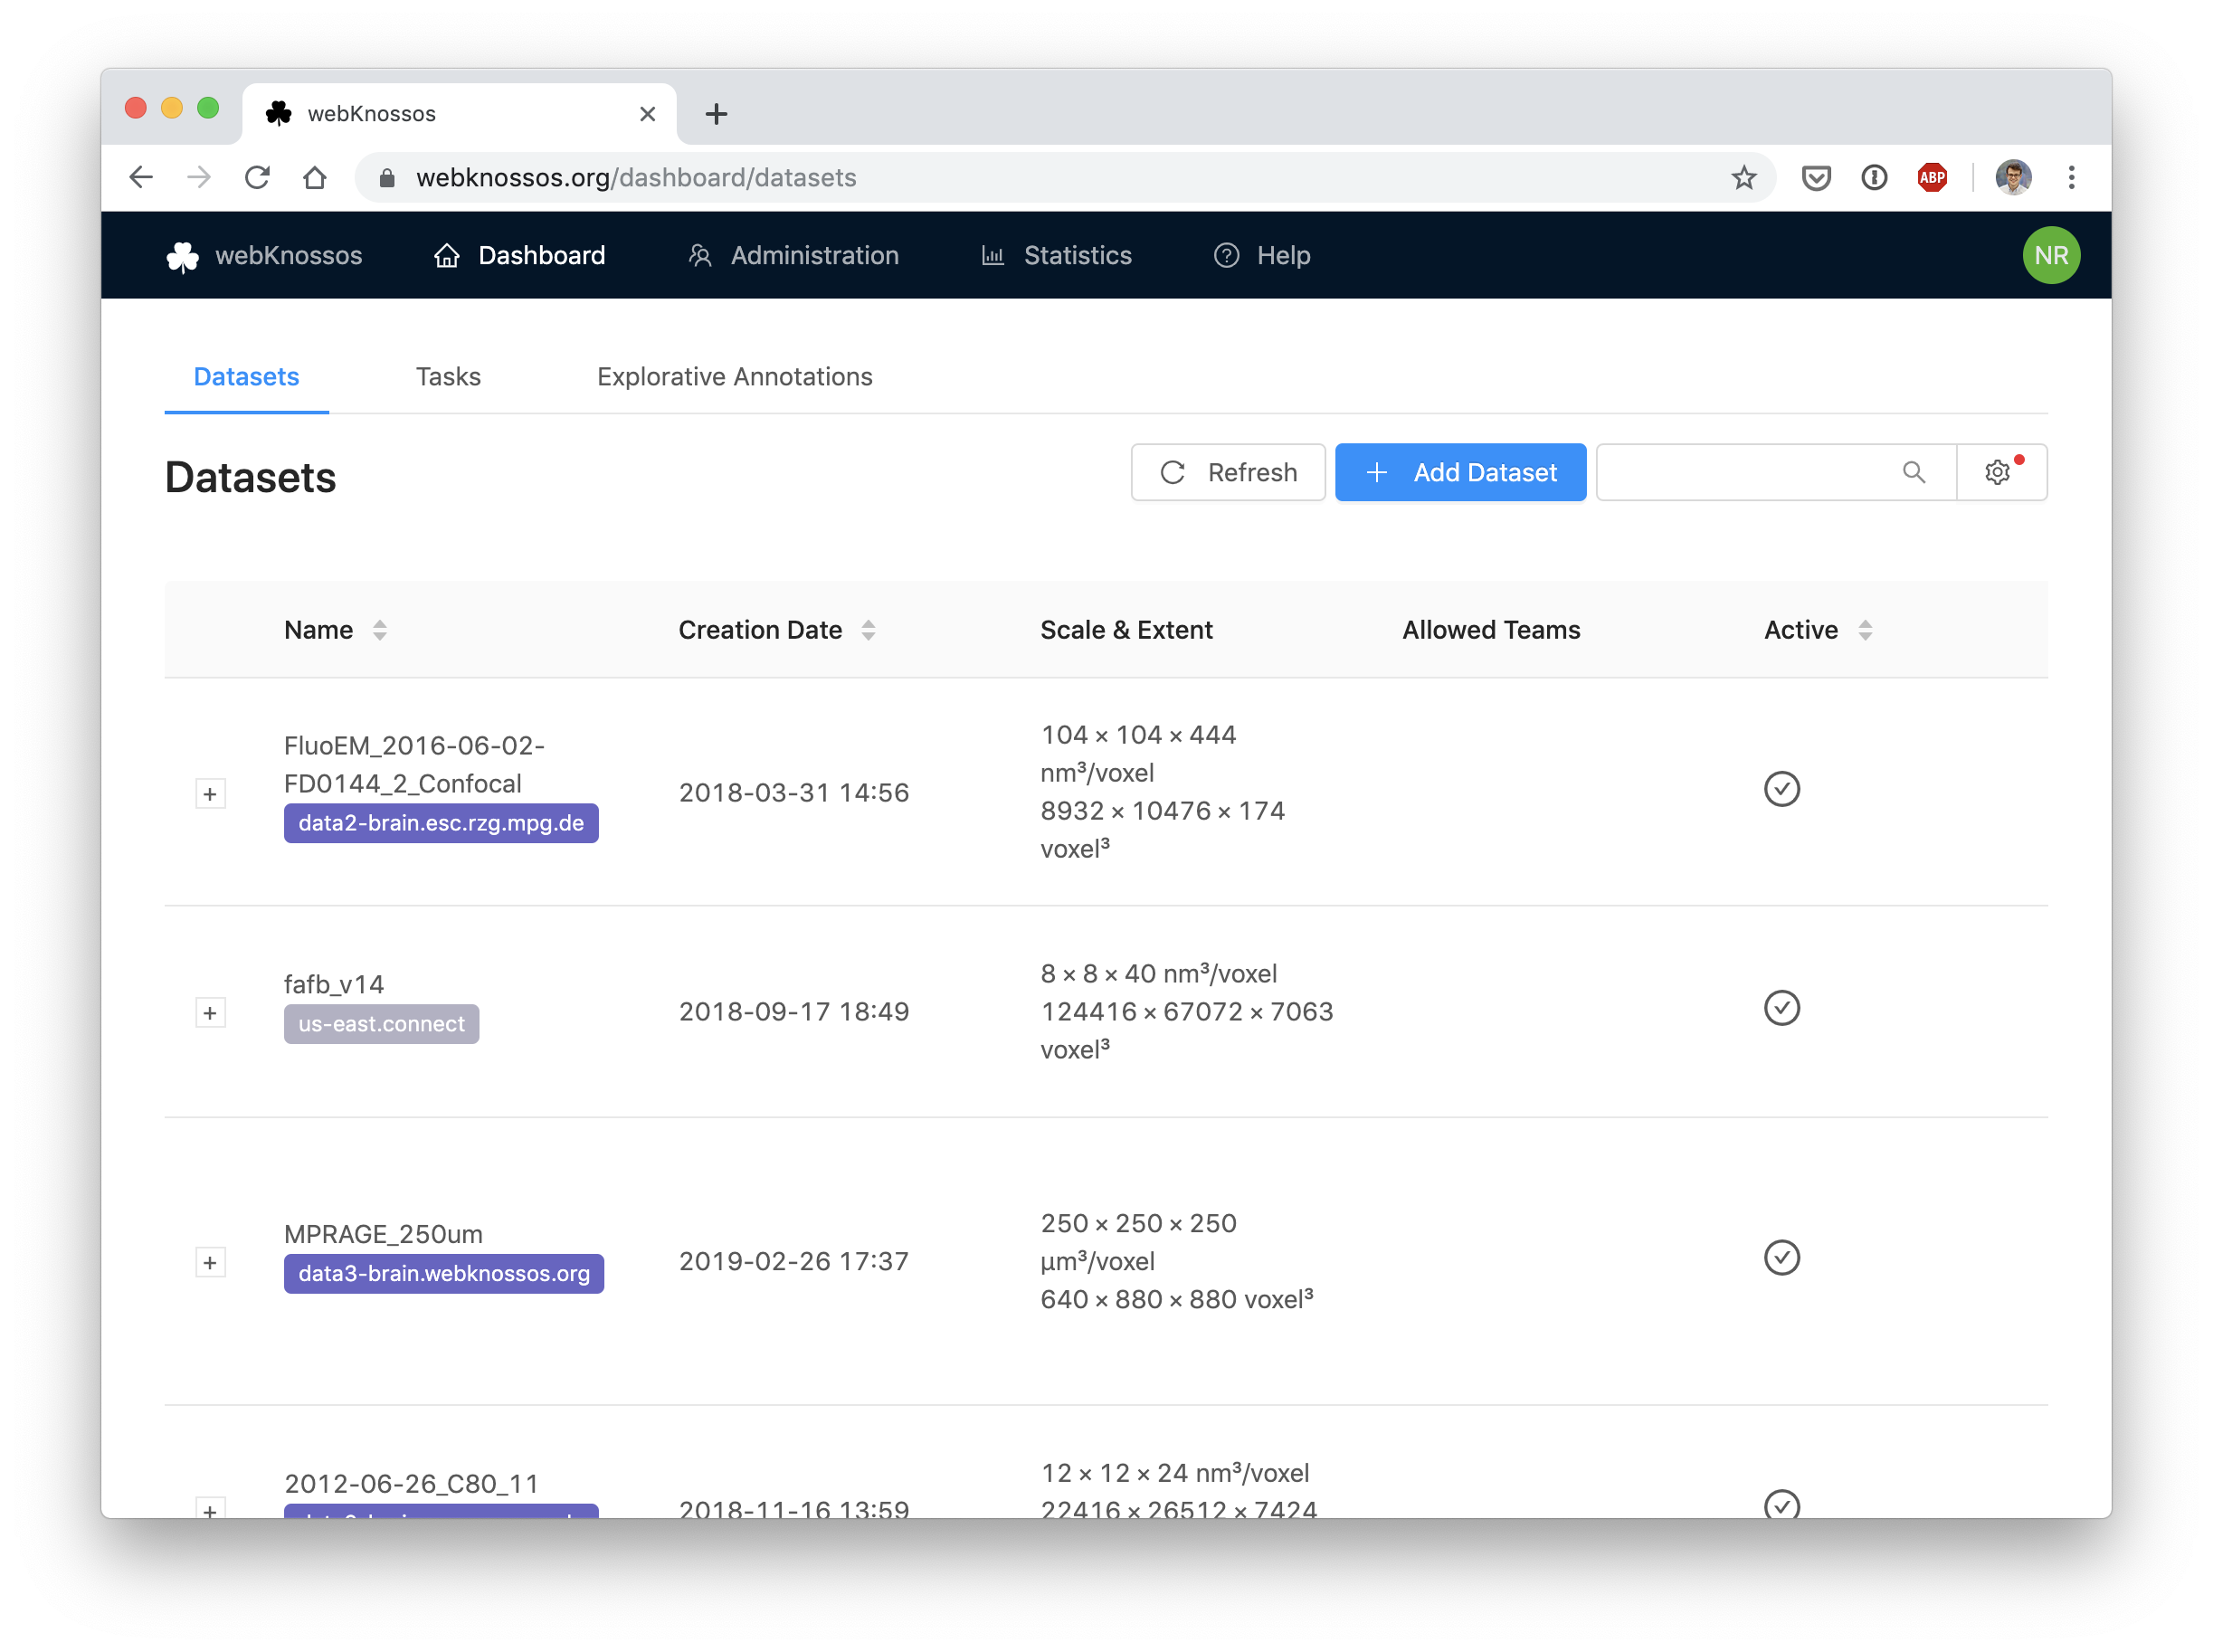
Explore Published Datasets
On webknossos.org there are already a bunch of published community datasets available for you to explore.
To get started, navigate to the Featured Publications tab on your dashboard.
There, you find a list of all available public datasets.
Click on the dataset name to open the dataset.
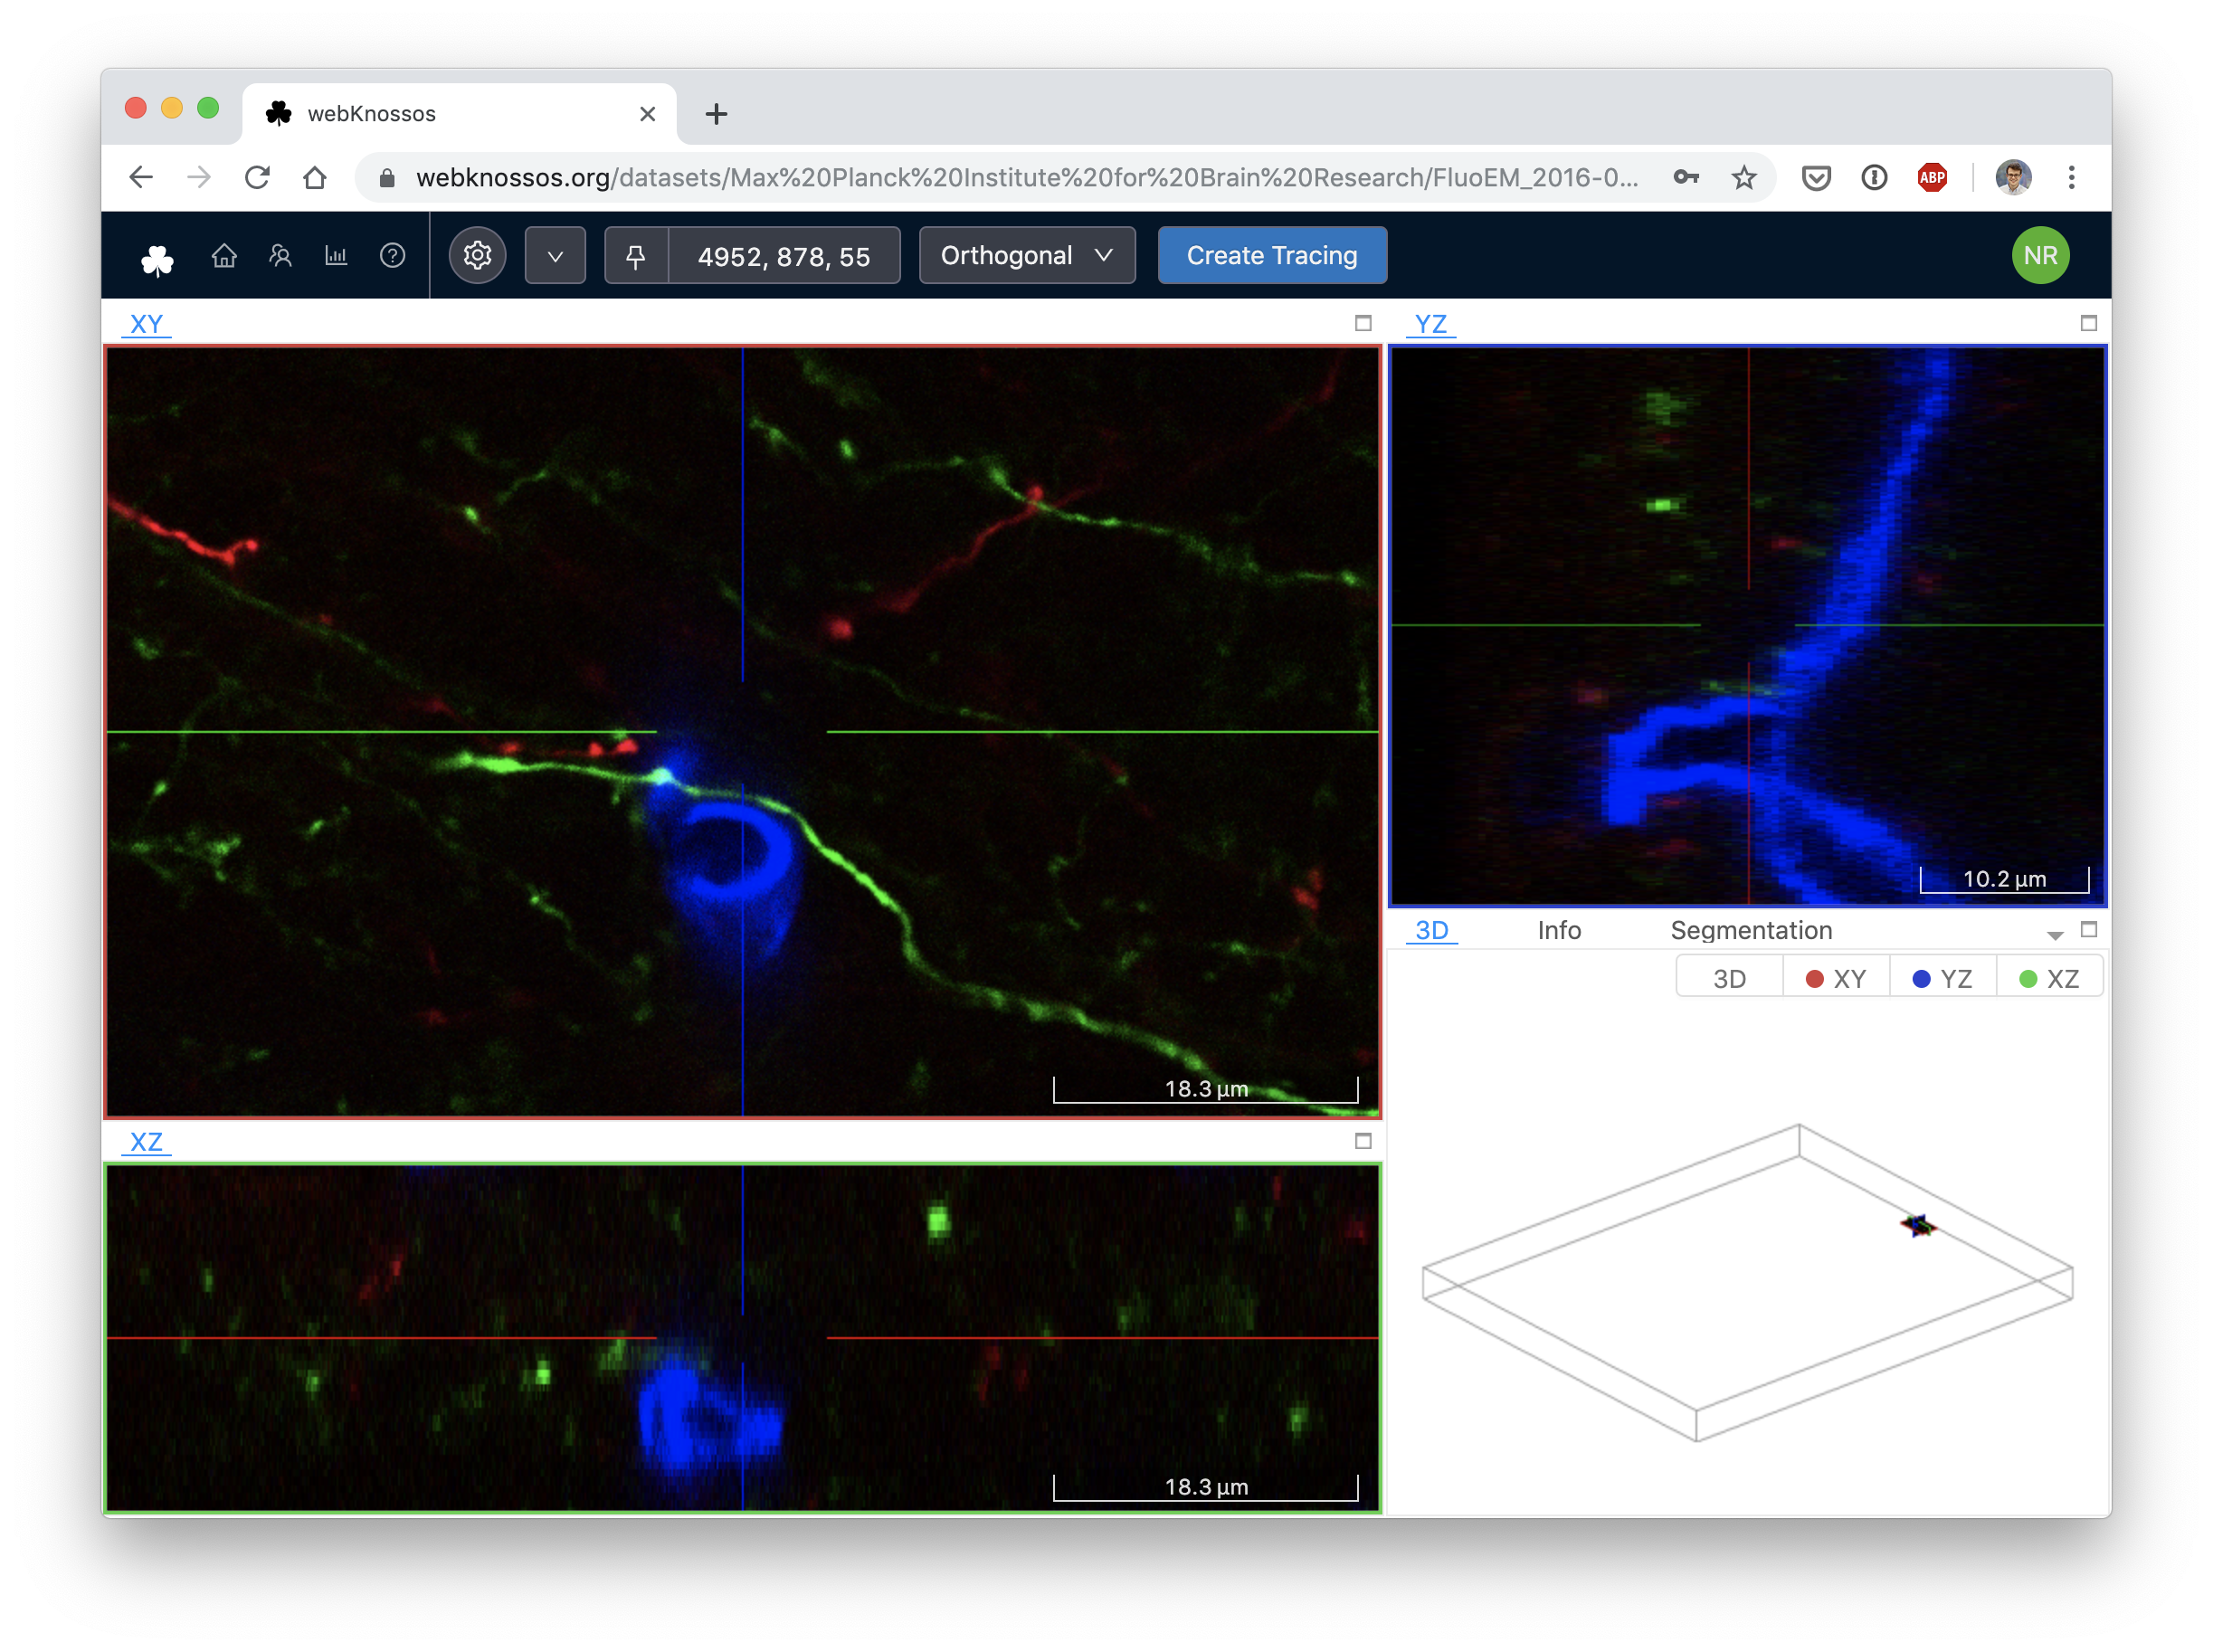
Once you are in the view mode, you are presented with three orthongonal views and one 3D viewport. You can use the following shortcuts to navigate the data. See the full list of gestures and keyboard shortcuts for advanced use.
| Shortcut | Operation |
|---|---|
| Left Mouse Drag or Arrow Keys | Move In-Plane |
| SPACE or Mousewheel | Move Forward |
| SHIFT + SPACE or Mousewheel | Move Backward |
| I or ALT + Mousewheel | Zoom In |
| O or ALT + Mousewheel | Zoom Out |
| Scroll Mousewheel (3D View) | Zoom In And Out |
| Right Click Drag (3D View) | Rotate 3D View |
| . (Dot) | Toggle Viewport Maximization |
You can also change the size of the viewports to see more details in your data and customize your layout.
Your First Annotation
Click the Create Annotation button from the view mode of a dataset to create your first annotation.
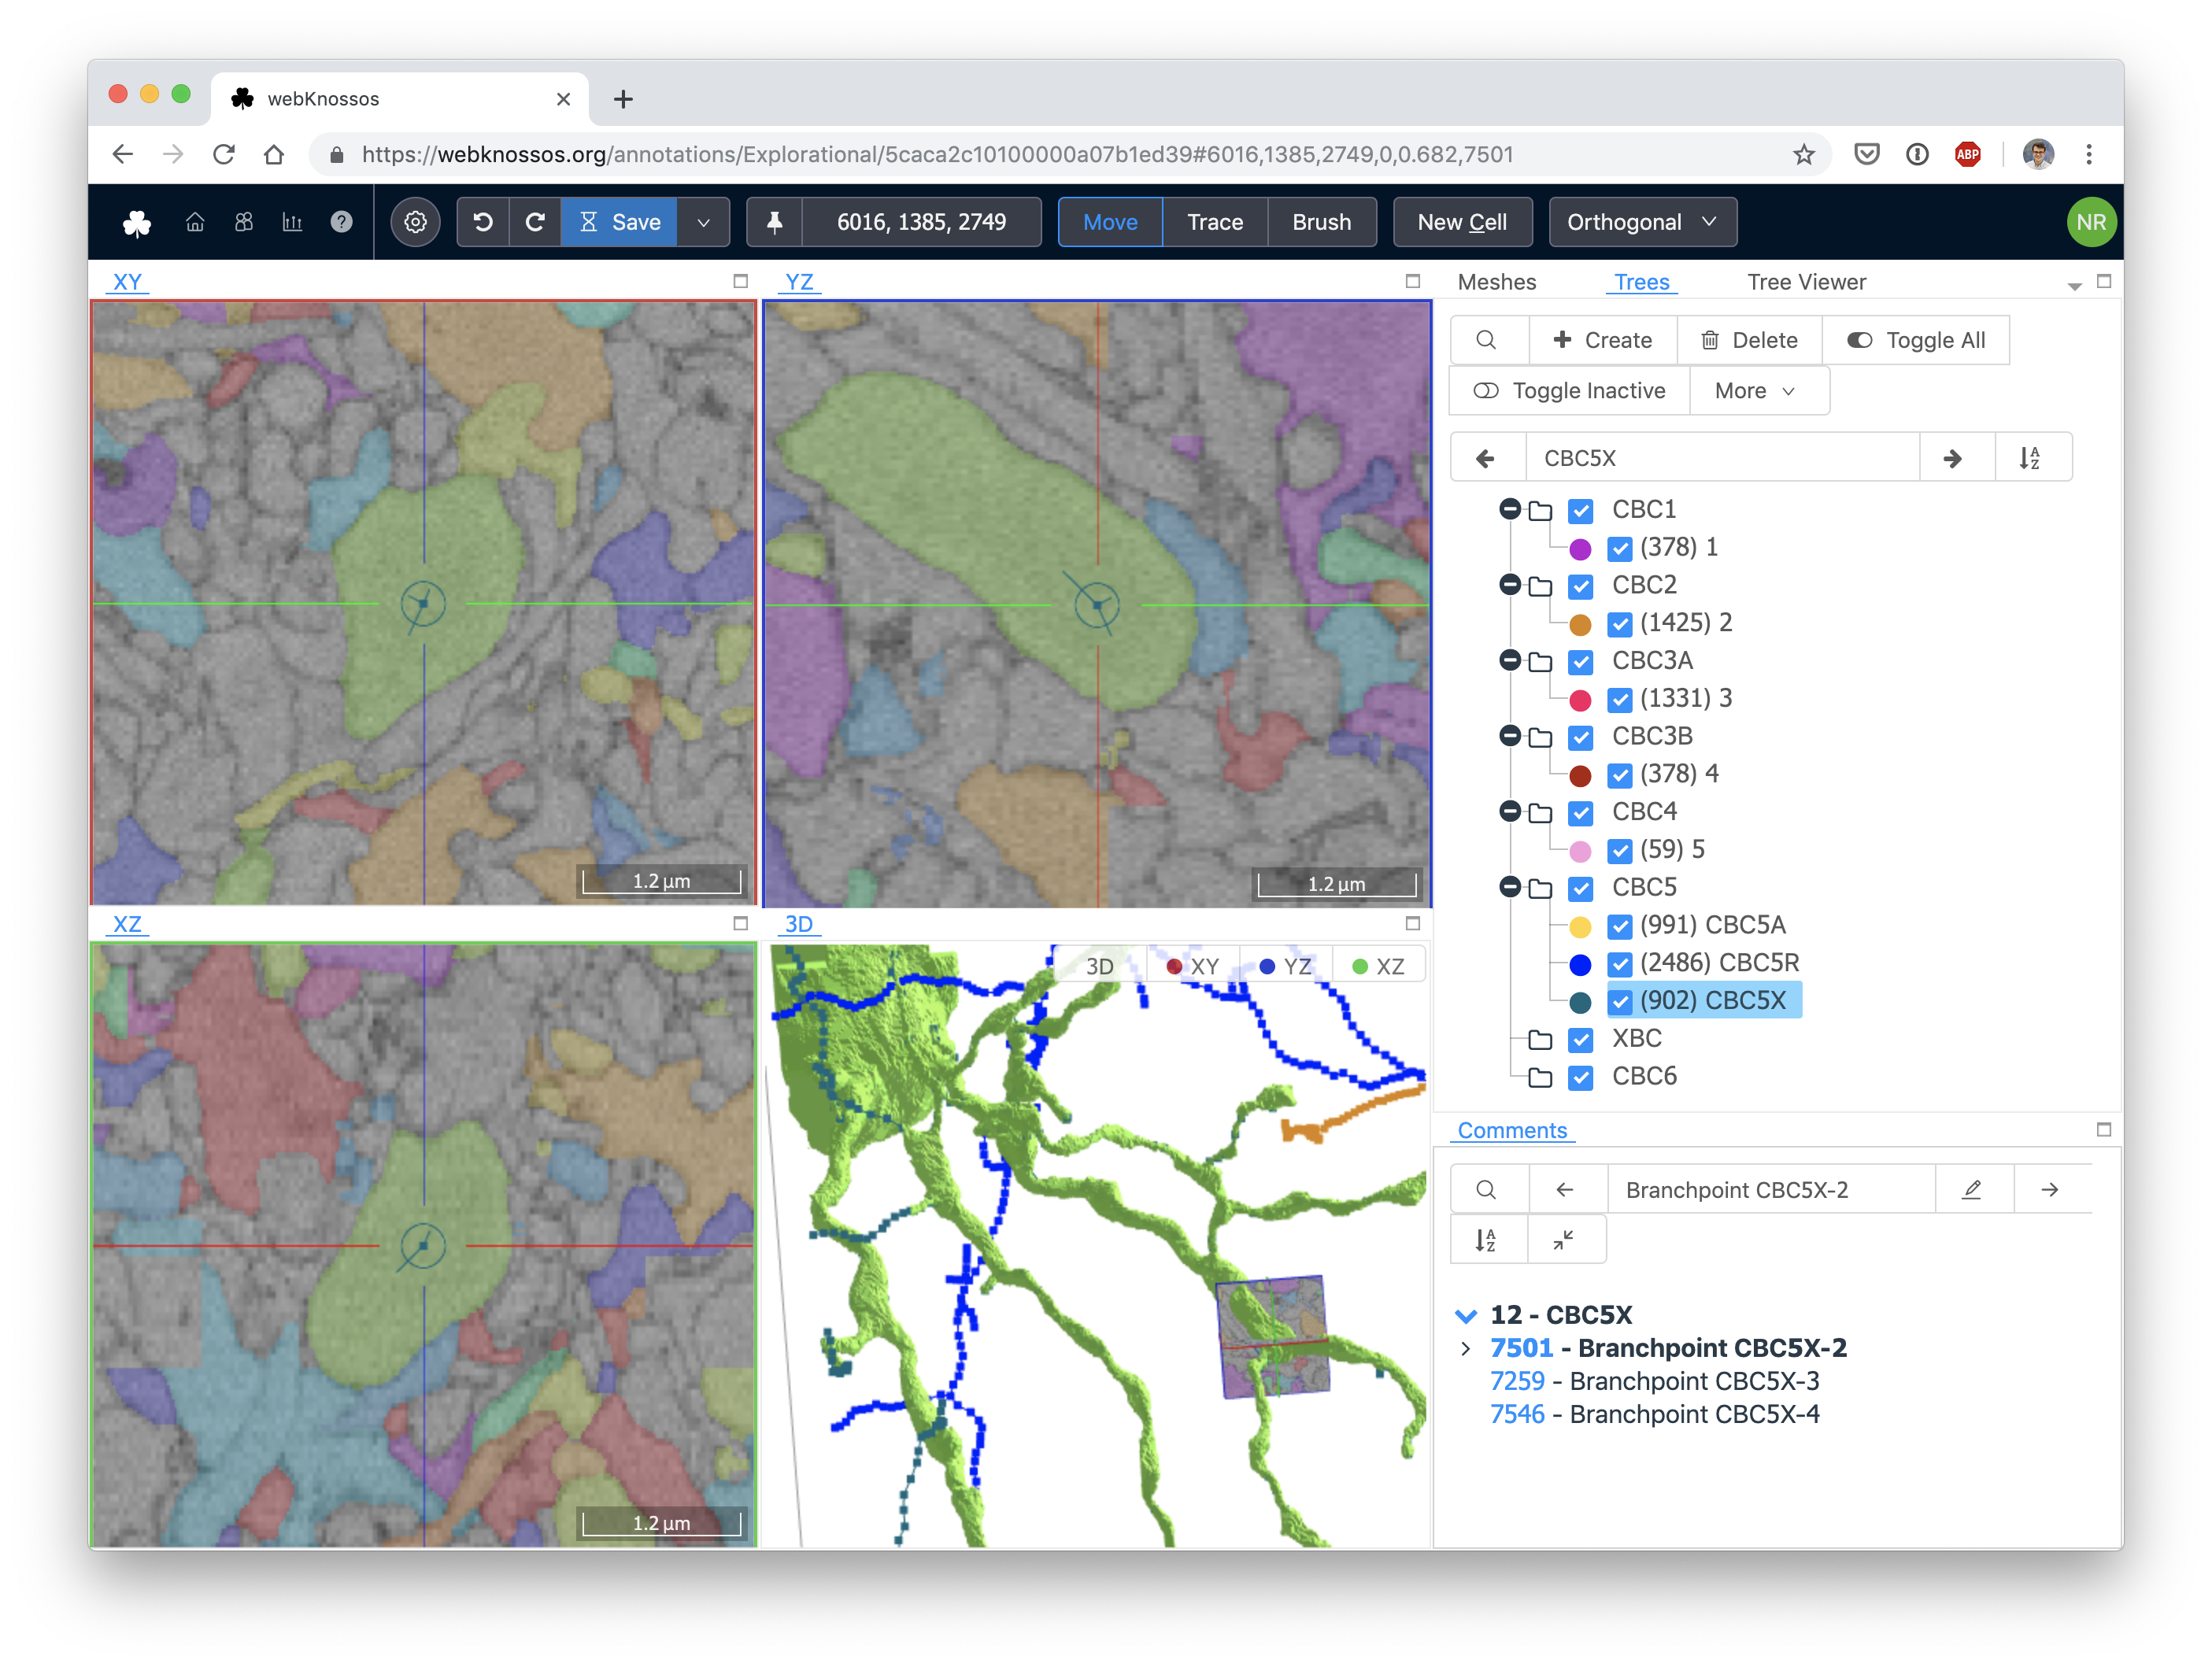
webKnossos will launch the main annotation screen allowing you to navigate your dataset, place markers to reconstruct skeletons, or annotate segments as volume annotations.
Depending on the current tool - selectable in the top bar - various actions can be performed. Note that the most important controls are always shown in the status bar at the bottom of your screen. The first tool is the MOVE tool which allows to navigate the dataset by moving the mouse while holding the left mouse button. In the SKELETON tool, left click can be used to place markers in the data, called nodes. Additionally, the left mouse button can also be used to navigate around, select or drag nodes. The DRAW tool allows to "paint" voxels to create volumetric annotations.
A right click can be used to open a context-sensitive menu with various actions, such as merging two trees or flood-filling a segment. Note that "Classic Controls" can be activated in the settings sidebar which assigns more specialized behaviors to the right click (e.g., dragging with the right mouse button in the draw tool will erase data). Basic movement along the 3rd axis is done with the mouse wheel or by pressing the spacebar keyboard shortcut.
Learn more about the skeleton, volume, and hybrid annotations as well as the interface in the Annotation UI guide.
Learn More
Now you know the basics of webKnossos. Feel free to explore more features of webKnossos in this documentation.
- Dashboard
- Skeleton Annotations
- Volume Annotations & Proof-Reading
- Keyboard Shortcuts
- Understanding the User Interface
- Sharing
- Datasets and Data Formats
- User and Permission Management
- Task and Project Management
- FAQ
If you need help with webKnossos, feel free to contact us at hello@webknossos.org or write a post in the forum. scalable minds also offers commercial support, managed hosting and feature development services.
Read the installation tutorial, if you wish to install webKnossos on your own server.